How to Improve Clinical Photography Image Quality in Craniomaxillofacial and Reconstructive Surgery
November 18, 2023
J Diagn Treat Oral Maxillofac Pathol 2023;7: 132–144.
DOI: 10.23999/j.dtomp.2023.11.1
Under a Creative Commons license
HOW TO CITE THIS ARTICLE
Mosquera C. How to improve clinical photography image quality in craniomaxillofacial and reconstructive surgery. J Diagn Treat Oral Maxillofac Pathol 2023;7(11):132–144. https://doi.org/10.23999/j.dtomp.2023.11.1
ARTICLE IN THE National Repository of Academic Texts
https://nrat.ukrintei.ua/en/searchdoc/2023U000203/
ABSTRACT. АНОТАЦІЯ УКРАЇНСЬКОЮ (PDF). ABSTRACT IN UKRAINIAN.
Objective: The aim of this paper is to describe the most common variables impacting image quality and discuss tips to improve clinical perioperative photographic skills in craniomaxillofacial and reconstructive surgery.
Methods: We conducted a comprehensive review of the literature to describe the basic concepts of photography and its applications in medical perioperative photography. Data sources included peer-reviewed articles and clinical studies on medical photography.
Results: Medical photography in craniomaxillofacial and reconstructive surgery is an indispensable tool for obtaining precise documentation of conditions and surgical procedures. To understand the basics of medical photography, it is necessary to be familiar with the fundamental concepts of photography, such as exposure, aperture, shutter speed, ISO, and composition, as well as basic camera specifications, lenses, and flash equipment. Perioperative medical photography can be divided into pre-operative, intra-operative, and post-operative photography. While the basic concepts of photography are transferrable among the different phases of perioperative photographic documentation, some tips can be applied to improve the quality of the images at each stage.
Conclusions: Enhancing the quality of perioperative photography is essential for the comprehensive documentation and communication of surgical procedures. The standardization and consistency in photographic tools, a clean surgical field with good framing, lighting, and focus with the appropriate aperture and shutter speed will produce better and sharper images.
Keywords: Photography, Intraoperative Photography, Medical Photography, Surgical Photography, Maxillofacial Surgery.
Edited by Ievgen Fesenko, Kyiv Medical University, Ukraine. Reviewed by John Le, University of Alabama at Birmingham, USA and Oleg Mastakov, Private Practice, Ukraine.
1. Introduction
Medical photography is an indispensable visual documentation technique that has transformed the practice of medicine, serving as a powerful tool for healthcare professionals, researchers, and educators. By precisely capturing clinical images, medical photography enables the visual representation and recording of medical conditions, surgical procedures, diagnostic findings, and therapeutic outcomes1.
Photography in craniomaxillofacial and reconstructive surgery is essential in the perioperative setting, serving as a primary tool for surgical planning and critical analysis of the results. All medical photographs should be standardized with consistent technical settings, appropriate background, and lighting2.
This paper describes the most common variables impacting image quality and discusses tips to improve clinical perioperative photography skills in craniomaxillofacial and reconstructive surgery.
2. Materials and Methods
Basic Concepts of Photography
Photography is defined as the process of creating images by the action of light on a sensitive surface, such as a film or an optical sensor.
The most important feature of a good-quality image is lighting. The light or dark of an image is considered exposure; if an image is too bright, it is over-exposed; and if it is too dark, it is under-exposed.
The settings to obtain a well-exposed photograph are explained by the concept of the Exposure triangle. The three camera settings that give control of the exposure of a photograph are the aperture, shutter speed, and ISO. The aperture controls the aperture blades inside the lens, the shutter speed controls how much light is allowed to the sensor, and ISO controls how sensitive the sensor of the camera is to the light (Fig 1). The values of these settings are measured in stops of light. Each stop of light will allow or restrict twice the amount of light reaching the sensor.
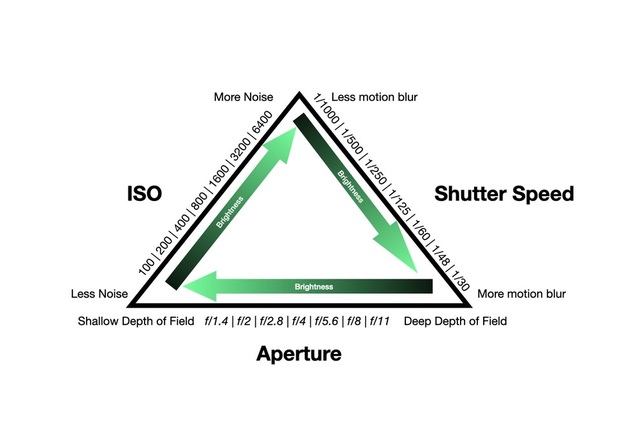
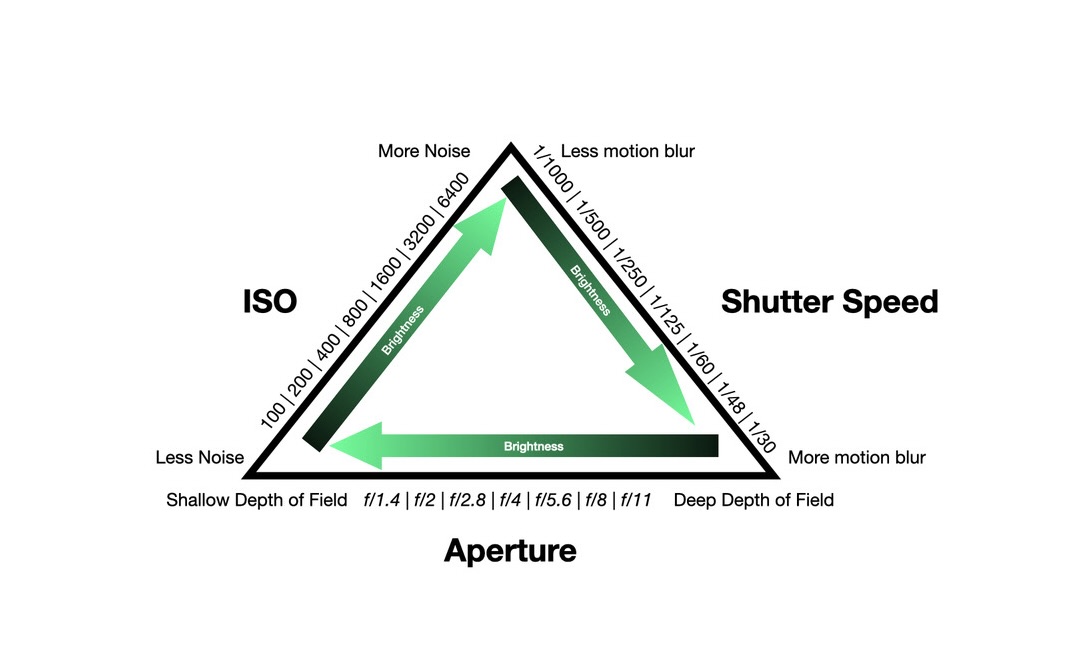
FIGURE 1. The exposure triangle shows how exposure is affected by ISO, Shutter speed and Aperture.
Aperture
The aperture is indicated in the lenses and measured in f Stops. The stops for the aperture start at f/1.4, f/2.0, f/2.8 and go up to f/32. The lower the number, the more light is allowed to the sensor. The aperture controls the blades to allow or restrict the passing of light in the same way as the Iris works in the human eye. A wide-open Iris or a Wide-open lens (f1.4) will allow more light than a narrow Iris or a narrow aperture number (f/22).
The aperture also allows to control the depth of field. The depth of field determines which parts of the photo are in focus. A wide aperture creates a shallow depth of field where only one area of the photo is sharp, and the foreground and background are out of focus, while a narrow aperture gives a deep depth of field where everything is sharp.
Shutter Speed
The shutter speed is how fast or slow the camera shutter closes. It is measured in seconds or fractions of seconds. It can be as slow as the operator desires for creating “long-exposure” images or can be as fast as 1/8000 of a second to create a shorter exposure (allowing or restricting the amount of light the camera takes in).
A slow shutter speed will also create motion blur, which is the effect caused by a subject or the camera moving while capturing the image, hence leading to less sharp images.
ISO
ISO is the camera sensitivity or “gain” to the light; it starts at 100 and can go up as high as 102.400 in some cameras. A lower ISO number means less sensitivity to light, hence, darker images, while high ISO numbers lead to brighter images. ISO can help to capture images in darker environments or be more flexible with the aperture and shutter speed settings. However, raising the ISO can lead to noise or grain in the images, creating low-quality pictures.
The Camera Body
The most used cameras nowadays are digital cameras; these can be divided between Digital single-lens reflex (DSLR) and mirrorless cameras, the latter being the most recent type of digital camera. The mirrorless cameras provide a reconstructed digital image that can be seen in the back-screen or the view-finder of the camera, whereas the DSLR has a mirror allowing one to see the exact representation of the image to be taken3.
There are five key points on the technical specifications of the camera body to consider: The type of sensor, resolution, ISO sensitivity, auto-focus points, and speed.
Type of Sensor
The sensor of a camera is one of the most essential elements of the camera. It captures the light and digitally documents the photograph. This is the equivalent to the films in the digital era. Cameras have different types of sensors: APS-C and Full Frame sensors. APS-C is the most used format in entry-level cameras, with a broad selection of low-cost lenses. Full frame sensor is the most used in high-end and professional cameras; they provide the highest quality of image due to better low-light performance with more expensive lenses and camera body options.
Resolution
The resolution is the number of pixels that can be captured by the camera sensor, and it is measured in Megapixels (MP). If a camera can capture photos in a size of 6000x4000 pixels, it has a total area of 24.000.000 pixels, which is equivalent to 24 Megapixels or 24MP.
It is wrong to think that the resolution is the most important characteristic of a camera for better image quality; however, better image quality is attributed to better noise performance, faithful color reproduction, and better dynamic range. It is widely believed that high-megapixel cameras have more detail, but low-megapixel cameras have an advantage with less noise and better high ISO performance at pixel level.
Low-megapixel cameras provide smaller files, which leads to a faster workflow, faster camera performance, lower noise, and cleaner images; however, high-megapixel cameras can duplicate these results while giving the advantage of providing larger files with more pixels, thus allowing for more cropping in post-processing. When an image obtained from a low-megapixel camera is cropped to eliminate the non-important areas of the surgical field, the final size of the image is smaller; thus, it contains fewer pixels. If this cropped image is then stretched for a lecture presentation or for a paper publication, this small number of pixels is stretched, leading to a low-quality image. A high-megapixel camera provides a larger image; when this image is cropped, a higher number of pixels remain in the photograph, leading to a better image quality when it needs to be stretched.
ISO performance
ISO is the sensor’s sensitivity to light. A camera with a high ISO range will allow a better low-light performance with low grain or noise when high ISO numbers need to be used in low-light situations.
Auto-focus points
Manual focus is seldom used in medical perioperative photography; modern cameras have high-end auto-focus technologies that can achieve focus with great success.
Digital cameras can auto-focus on different areas of the subject we are photographing. More auto-focus points provide more flexibility in the areas that can be focused on the frame due to the camera's ability to focus on a greater zone and not only on some limited points.
One of the advantages of the new generation cameras is the Eye AI-Autofocus function. This option is extremely useful, especially in portrait photography, allowing the camera to identify the eye of the subject and achieve focus with great accuracy.
Most cameras also provide a Focus-Lock button. This option allows the operator to “lock” the focus point and readjust the position of the camera to reframe the shot without losing the desired area of focus. To set up the Focus-Lock button, it is necessary to follow the camera’s user manual since this varies between each model; this function is also known as back-button focus.
Speed
The speed of the camera is measured in frames per second (FPS). A camera with a higher FPS rate allows one to capture more images when photographing action or movement.
In the field of medical photography, a camera with a low FPS rate performs well since the image is obtained of a still subject.
The Lenses
Camera lenses can be broken down into zoom and prime lenses. Zoom lenses are one of the most common types of lenses and are the most versatile choice for medical photography. The range of a lens is defined as the focal length, and it is measured and indicated in millimeters (mm). Zoom lenses have variable focal lengths, with 24-70mm being one of the most popular lenses for intraoperative photography, allowing the operator to get shots in proximity to the surgical field or zoom in from a farther position when necessary. The 18-55mm lens is another zoom lens that can also be used for intraoperative photography; this lens usually comes in a kit with entry-level cameras.
Prime lenses have a fixed focal range, meaning that the operator can’t zoom in or out. The main advantage of prime lenses is that they specialize and are tuned to deliver one specific type of photography, unlike a zoom lens, which can be used in a multitude of cases.
One of the most common prime lenses used for craniomaxillofacial and reconstructive photography is the 100mm Macro lens. This prime macro lens allows the operator to get near the field and still be able to get the subject in focus, which makes it ideal for intraoral photography in craniomaxillofacial surgery.
The Flash
A flash is a device attached to the camera to create an artificial light source to light the subject. A flash unit fills an area with light, temporarily illuminating the subject and eliminating or creating deeper shadows. Most entry-level cameras have a built-in flash that can be used for intraoperative photography. However, the source of this artificial light can create undesirable shadows in areas that the surgeon wants to highlight. This is especially important in portrait pre-operative and post-operative photographs and intraoral photography. In these cases, using external flash can be beneficial, and using light diffusers, ring flash, or twin flash can improve intraoral and intraoperative photography by softening the light and creating a better distribution of the shadows on the field4.
The Image File Type
There are multiple image file types; knowing the differences between them can help the operator choose the most appropriate file to use based on their goal. Using the right type of file can improve the ease of sharing, image quality, software compatibility, and resizing ability.
The most common file types in medical photography are JPEG and RAW. JPEG is a format that compresses an image to make the file size smaller. JPEG files are some of the most popular and widely used image formats in the world. A RAW file contains all the uncompressed and unprocessed image data captured by the sensor of a camera. It is important to understand that RAW files are not images; they are just large files filled with image data as it was captured; hence, this file needs post-processing to obtain the final image.
The main difference between any JPEG and RAW file is its size. RAW files are significantly bigger than JPEG. That is because they contain all the raw image information captured by the camera sensor, working like a film negative from a traditional camera. The main advantage of shooting in RAW is that the operator ends up with high-quality files that can produce the best possible image after editing, but this requires image processing software to obtain a JPEG file after editing the image. When shooting in JPEG, the camera compresses a RAW file into a JPEG image; this makes the file significantly smaller while losing some of the data and detail from the photograph. The main advantage of shooting in JPEG is that the images are fully processed in the camera, and all settings such as White Balance, Color Saturation, Tone curve, and sharpening are already applied to the image. This eliminates the need for image post-processing, making the image basically ready to use.
Using RAW or JPEG is operator-dependent, and the decision should be made based on how comfortable the operator is with post-processing techniques and software. Surgical photography seldom requires extensive image post-processing. If the pictures are obtained with the correct camera settings, the JPEG file produced by the camera can be a high-quality image.
The White Balance
The color temperature is a physical property of light and is measured in Kelvin (K) (Fig 2). White balance refers to the adjustment of color temperature in an image to ensure accurate reproduction of colors under varying lighting conditions. The white balance adjustment is the process of removing unrealistic color cast so that objects that are white in person maintain the white color in the final image. In surgical photography, where precision is essential for diagnostic and educational purposes, maintaining an optimal white balance becomes particularly crucial. Accurate representation of tissue colors, lesions, and other clinical features is indispensable. When the white balance is not adjusted, the final image can reproduce an undesired yellow color cast from the ambient light, especially in the Operating room during intraoperative photography (Fig 3).
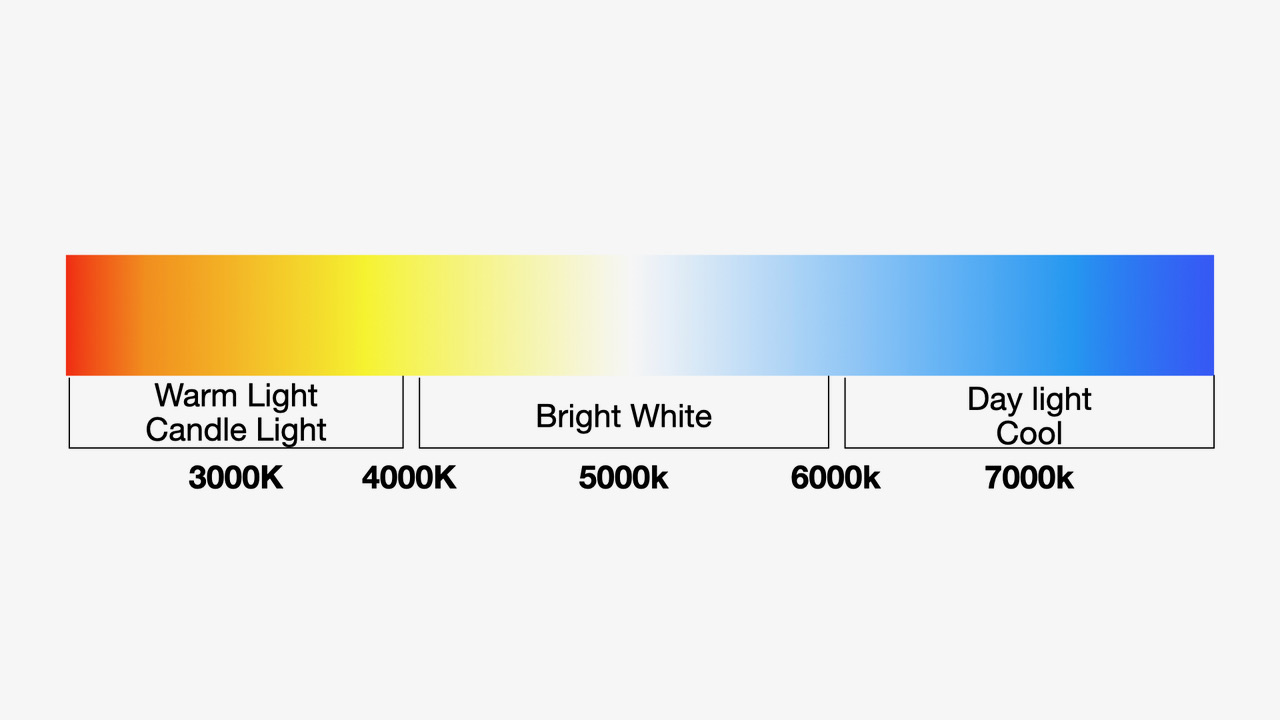
FIGURE 2. The color temperature scale measured in Kelvin (K).
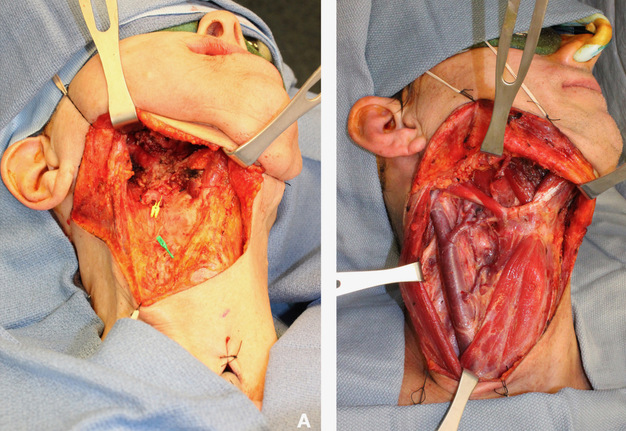
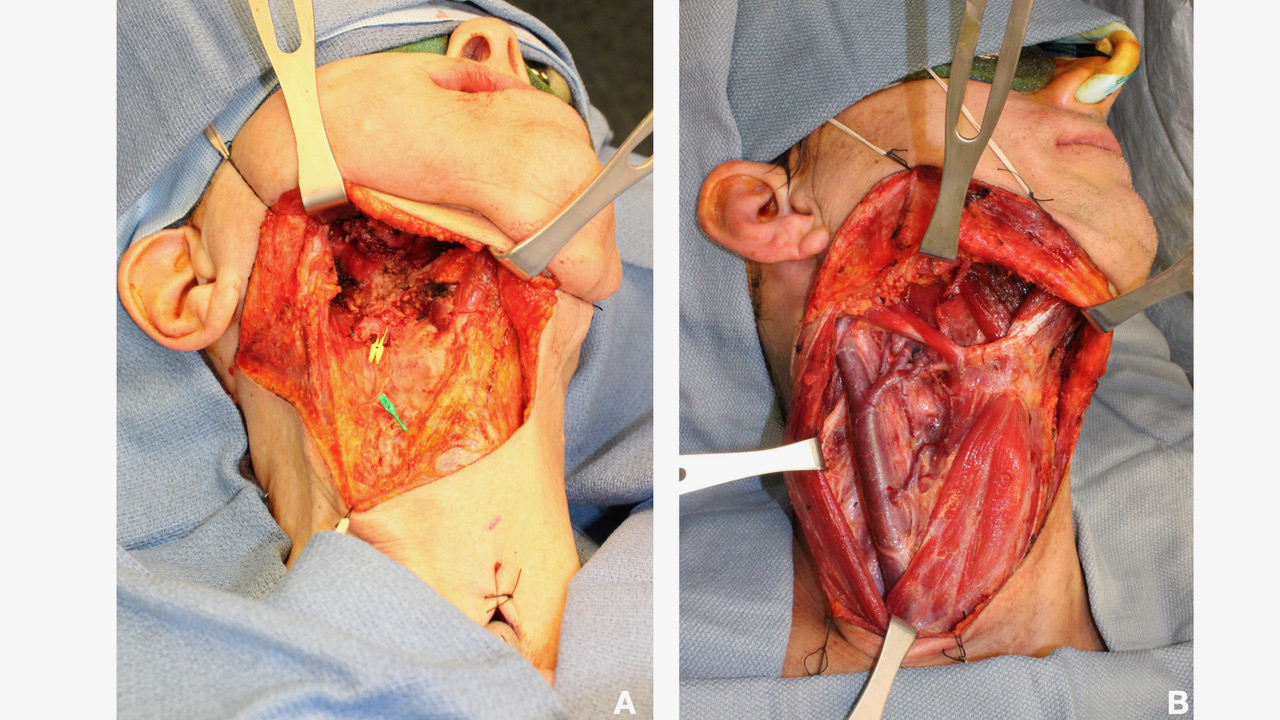
FIGURE 3. Sample of effects of white balance intraoperative photography. (A) Inaccurate White Balance producing undesired yellow color cast in the subject and instruments. (B) Intraoperative image with better white balance adjustment.
The camera has different white-balance options based on the ambient light temperature. Some cameras have the option to manually set a color temperature by choosing a specific Kelvin value, or this can also be modified with some included settings in-camera such as “sun,” “shade,” “tungsten,” and “fluorescent.”
Achieving the correct white balance in-camera is not concerning if the operator is shooting in RAW since the white balance can be completely adjusted in post-processing without affecting the quality of the image. However, if the operator is shooting JPEG instead, the white balance must be adjusted in-camera since modifying this later in post-processing can damage the image, not allowing the operator to get the colors right.
3. Discussion
Obtaining high-quality perioperative photographs can be as intricate as using specialized professional camera equipment2 or as straightforward as utilizing a smartphone with the right photographic techniques5,6. In the context of an operating room, where capturing precise details during surgeries is critical for documentation and medical education, the choice of equipment and methods becomes important. A professional camera setup with dedicated tools and accessories can offer superior image quality, granting operators precise control over the photographic process. Conversely, the ever-evolving capabilities of smartphones, when combined with basic yet effective photographic practices, have democratized the ability to document surgical procedures. The selection between these approaches should be made based on the specific needs of the task and the experience of the operator.
Capturing preoperative pictures
The primary objective of obtaining preoperative pictures in a medical or surgical context is to document and capture a visual record of the patient's condition and anatomical features before a surgical procedure or medical intervention. These preoperative photographs provide a baseline assessment of the patient's condition, enabling the surgical team to compare the state before and after surgery. They aid in surgical planning to strategize for the upcoming procedure. These images help to visualize the patient's anatomy, identify potential challenges, and develop a surgical plan tailored to the individual patient. Preoperative photographs are a valuable form of medical documentation, providing a visual record of the patient's condition, which can be added to their medical charts7.
The first step to improving the quality of the preoperative pictures is having a consistent background. Navy-blue backgrounds are a good choice since they provide an appropriate level of skin contrast from the subject area. Obtaining a consistent background can be challenging when the photographs are obtained in various exam rooms; this can be solved by painting one of the walls of the exam rooms to use as a background or by having a navy-blue blind that can be set in the exam rooms.
The patient should be positioned 0.5 meters away from the background, and the operator should be 1.5 meters away from the patient to prevent undesirable shadows in the background. When external flash devices are used, the lights should be positioned at 45o between the camera and the subject to allow for natural light reflection2. If a built-in camera flash is used, the camera should be held in landscape mode for frontal photographs and in portrait mode for lateral and ¾ photographs with the light source coming towards the face of the patient; this way, the shadows produced by the flash will be in the back of the head instead of the face (Fig 4).

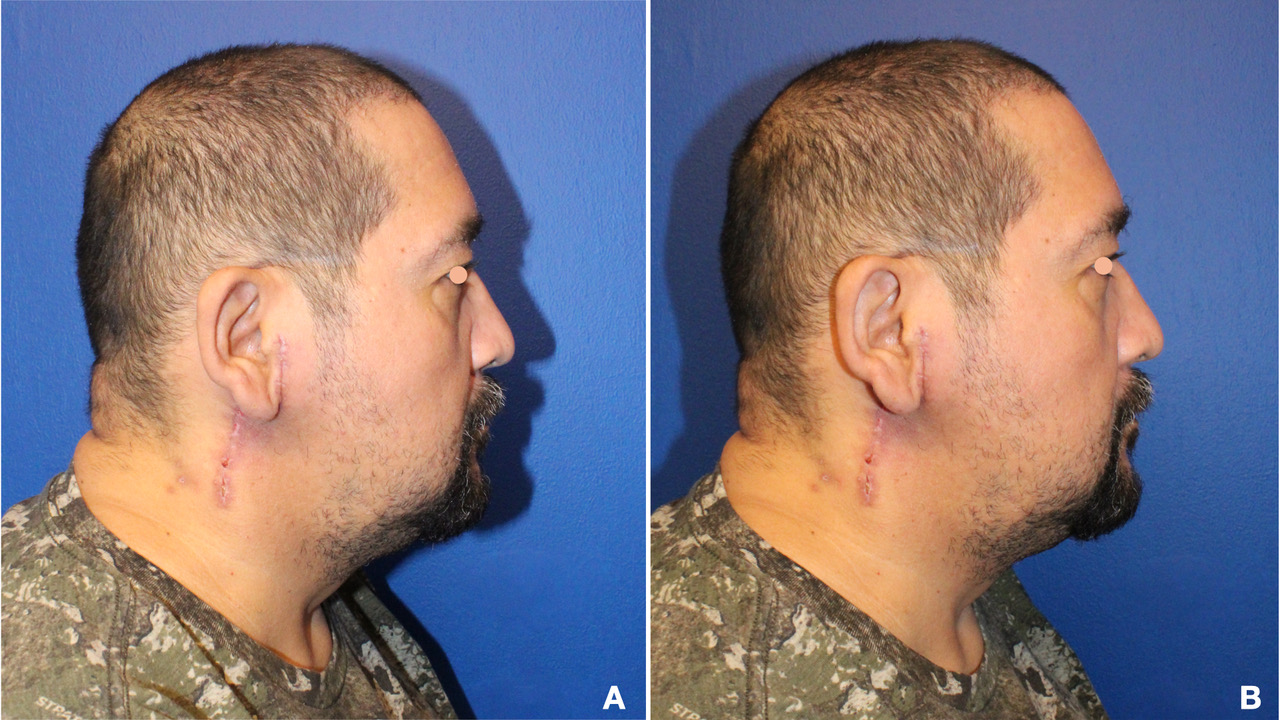
FIGURE 4. Sample of profile photographs obtained with the camera in (A) landscape “horizontal” and (B) portrait “vertical” mode using the built-in flash. A: The photograph in landscape mode has the shadow in the face of the subject, generating a loss of detail. B: The photograph in portrait mode with the built-in flash orientated towards the face of the patient transfers the shadow posterior to the head and lights the area of interest, hence preserving the details of the profile.
The patient's head should be positioned with the inter-pupilar plane parallel to the floor to achieve a natural head position.
The camera settings can be adjusted based on the available ambient light to obtain a well-exposed image. The initial camera settings that can be used as a starting point are:
-
Focus: The auto-focus mode in the camera will give the best result. The focus point must be placed in the patient's eye; this will provide a good portrait photograph. Some new cameras have an “Eye AI-Autofocus” option that allows the camera to identify and focus on the patient’s eye.
-
Aperture: An aperture of f/5.0 is a good starting point; this aperture, with a 55mm lens located at 1.5 meters from the subject, will provide a depth of field of 22cm, which is enough to get from the tip of the nose to behind the ears in focus.
-
Shutter Speed: Handholding the camera to obtain the photograph can introduce camera shake and motion blur to the picture, causing a lack of sharpness. A way to avoid this is by using shutter speeds faster than 1/80 of a second. Some cameras and lenses have Image Stabilization (IS) that allows the ability to capture sharp images of static subjects at slower shutter speeds; however, if Image Stabilization is not available in the camera, a tripod should be used to prevent camera shaking with shutter speeds lower than 1/60 of a second.
-
ISO: The ideal starting point is using the lowest ISO needed for a well-exposed image. This can be raised to need, being aware that depending on the camera’s ISO performance, noise can be introduced to the final image at around ISO 800. If the ISO is too high and generates too much noise or grain, attempt to have a lower shutter speed or wider aperture to decrease the ISO.
The next important consideration is framing the subject. The easiest way to ensure good framing is to attempt to have “blue background” all around the subject; that way, the image can be cropped in post-processing to highlight the area of interest.
Capturing Intraoperative Pictures
Intraoperative photographs are an excellent resource for demonstrating the technical aspects of surgical procedures. A clean field is the most important tip to achieve good intraoperative photographs. Like the preoperative photographs, it is suggested to use blue surgical towels as a background, removing redundant instruments and excess blood on the drapes8. Having surgical gauze or white sponges in the frame will generate an over-exposed area in the picture that will distract the viewer from the area of interest (Fig 5). The recommended position for the camera operator is from the surgeon’s view. While taking the pictures, the surgical light source should be turned off to avoid shadows that could affect the color balance. The surgeon’s and assistant hands and fingers should be out of the frame, using clean retractors and instruments to show the area of interest. The intraoperative photographs should be obtained after cleaning the entire surgical field of debris and any blood stains on the patient. The photograph should be framed in a way where a full view of the field is shown to effectively present the orientation and relationship of adjacent structures to the viewer9 (Fig 6); this area of interest should always be framed to capture enough of the blue towels around it to allow for cropping in post-processing (Fig 7).
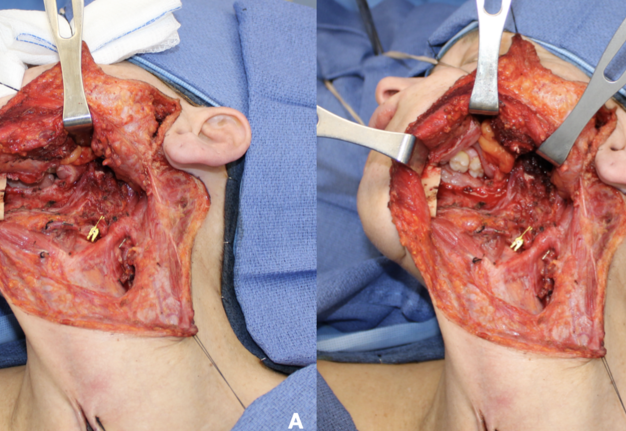
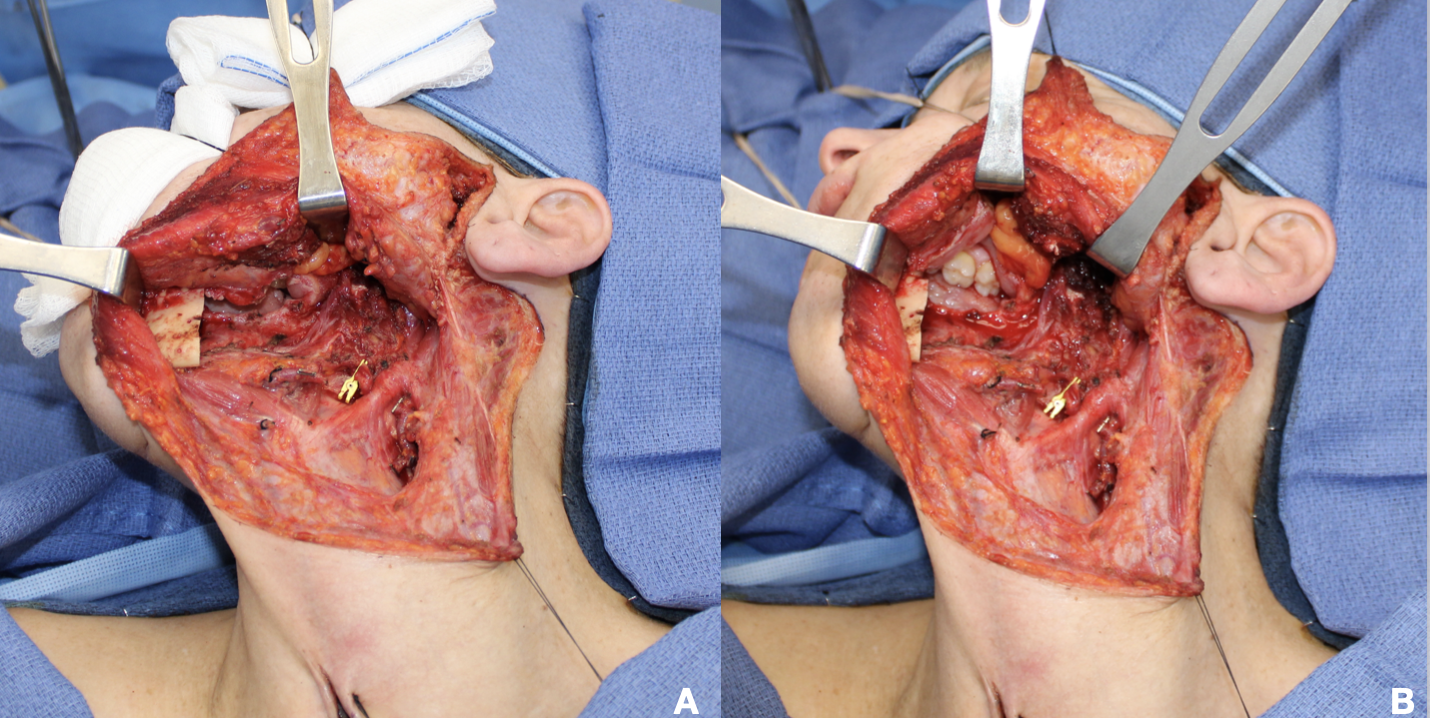
FIGURE 5. Photographs show the presence of a distracting element in the frame. A: The presence of a white surgical gauze in the picture creates an overexposed area that creates a distraction. B: By removing the distracting element, the final picture is well-balanced and exposed, making the viewer focus on the area of interest.
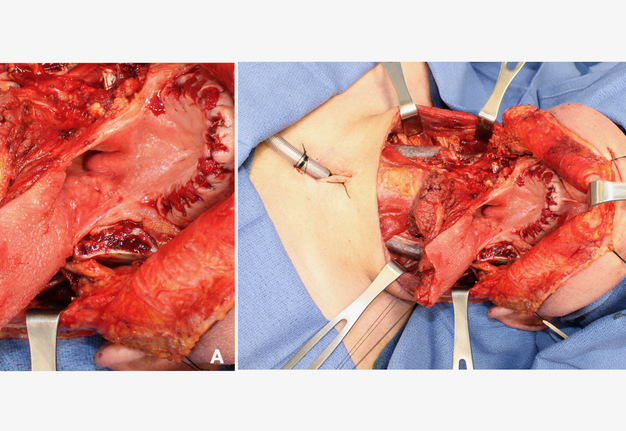
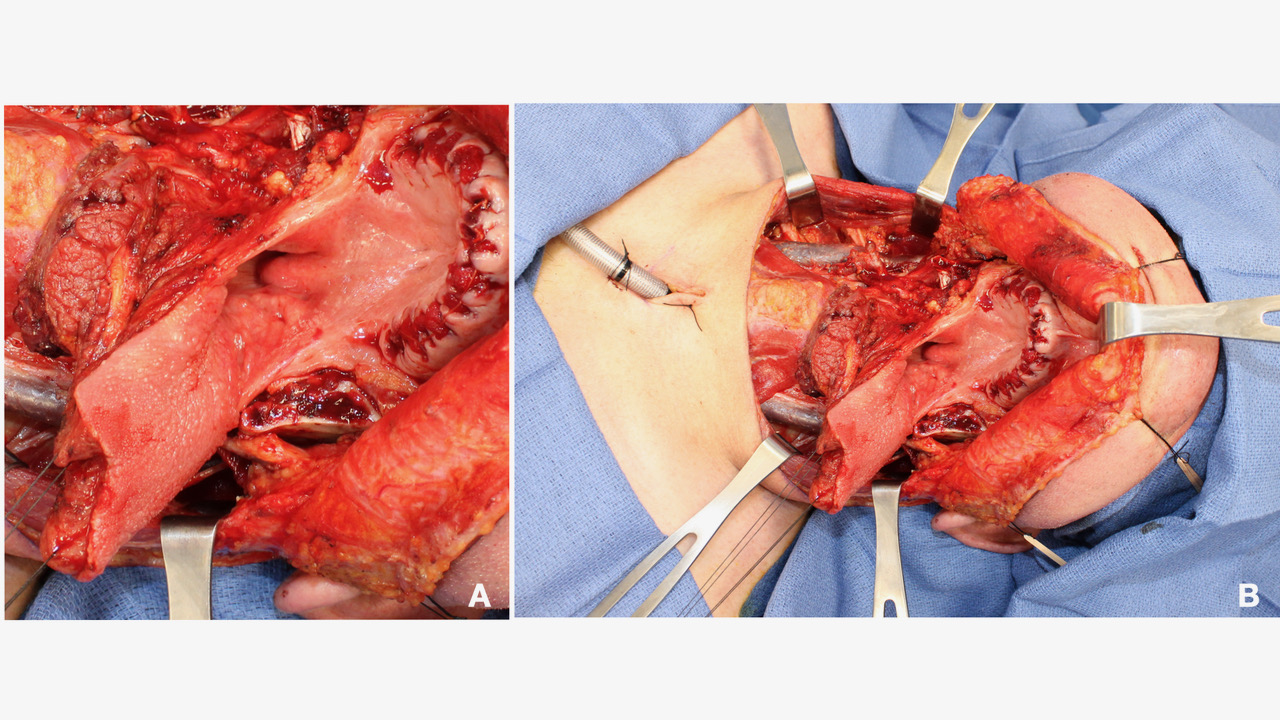
FIGURE 6. A: Close-up with minimal identifiable anatomical references creates confusion in the interpretation of an image. B: Adding identifiable anatomical landmarks on the frame allows an easier viewer orientation.
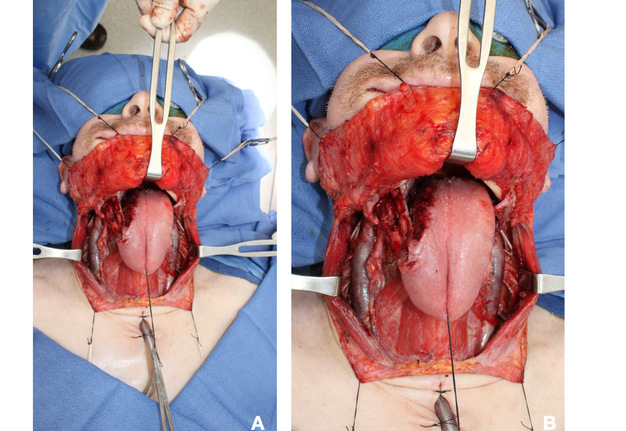
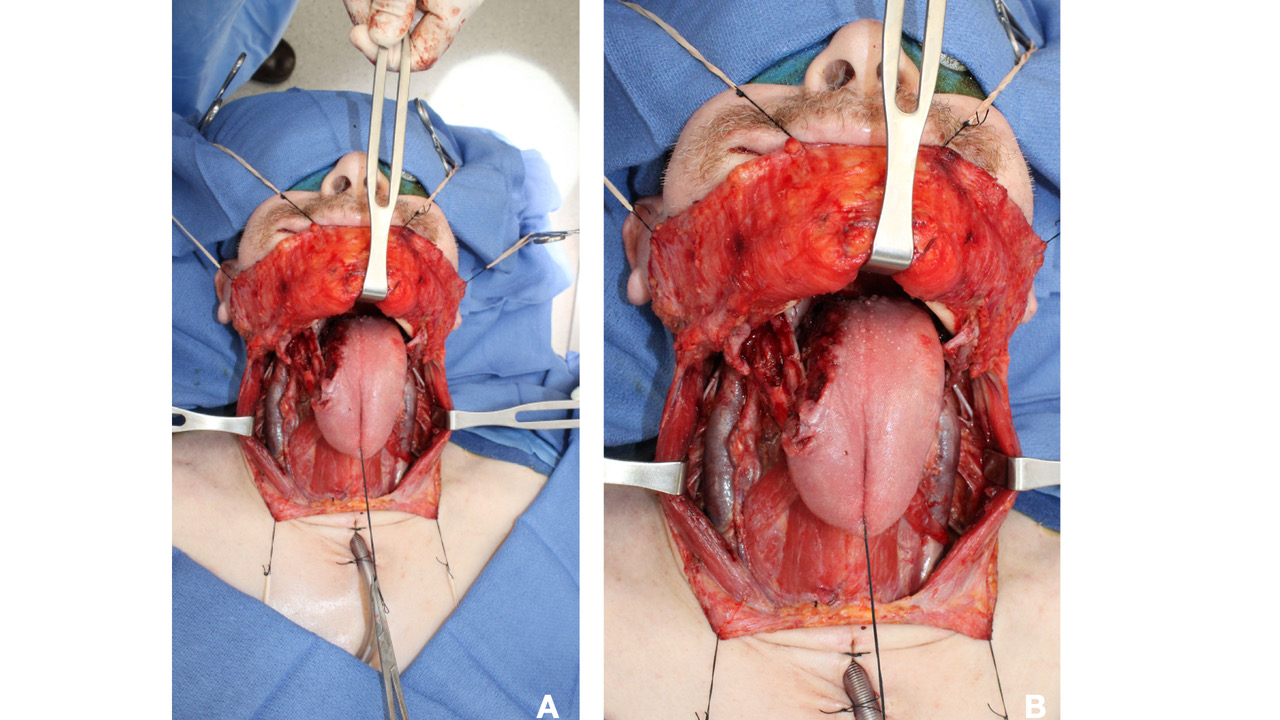
FIGURE 7. Using a wider focal length and incorporating the blue towels around the area of interest will allow more room for cropping in post-processing to eliminate distraction areas in the final picture. A: Original picture. B: Cropped picture.
In craniomaxillofacial surgery, the tissue layers are relatively close. Still, the distance from the plane of focus to the background or foreground can be slightly larger, requiring a mid-range depth of field (f/ 7.1 – f/8.0) to have all areas of interest in focus. If the objective of the photograph is to highlight a specific area, the aperture can be set wider to blur the foreground and the background (f/3.5 – f/4.0), and the focus point is set to the area of interest (Fig 8).
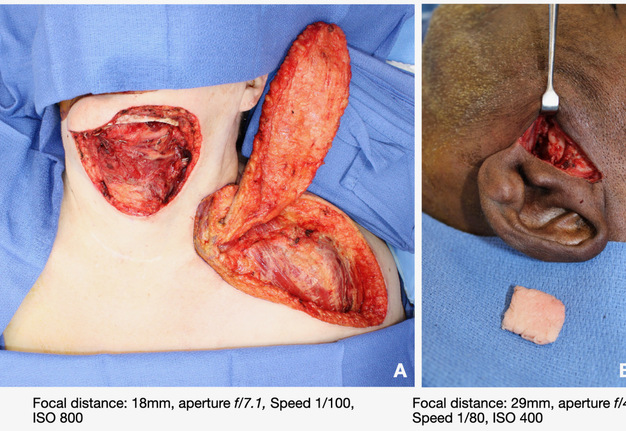
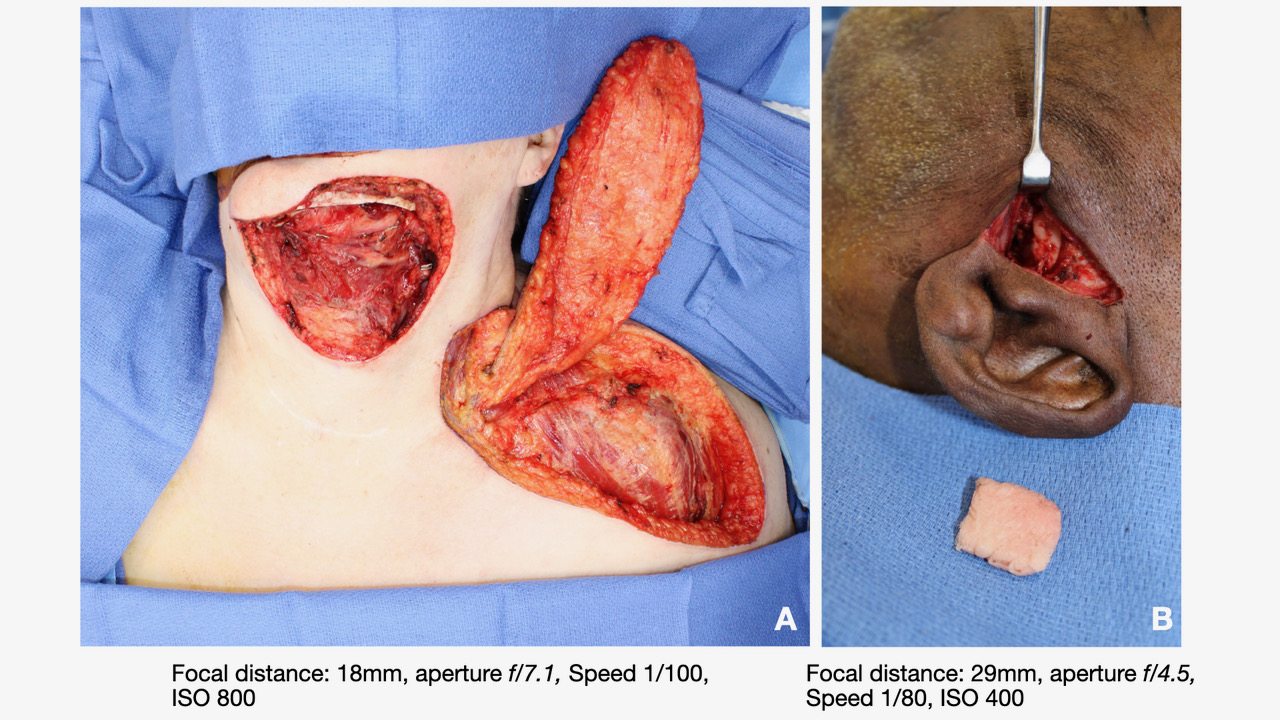
FIGURE 8. (A) Using a narrow aperture creates a deeper depth of field allowing the foreground and background in focus. (B) In this image, using a wider aperture caused the ear to be the only structure sharp and in focus; the bone in the background and the graft in the foreground appear blurry and soft.
A tip to facilitate the process of obtaining intraoperative images is to operate the camera in aperture priority mode (Fig 9), which is a semi-automatic mode where the operator sets the aperture (f/ stop) based on the desired depth of field and the camera automatically modifies the shutter speed and the ISO to obtain a well-exposed image. Care must be taken to identify when the camera sets a too-low shutter speed since this can produce motion blur due to camera shaking.
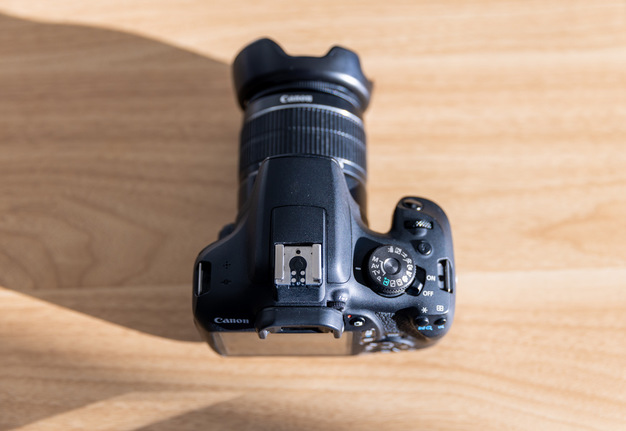
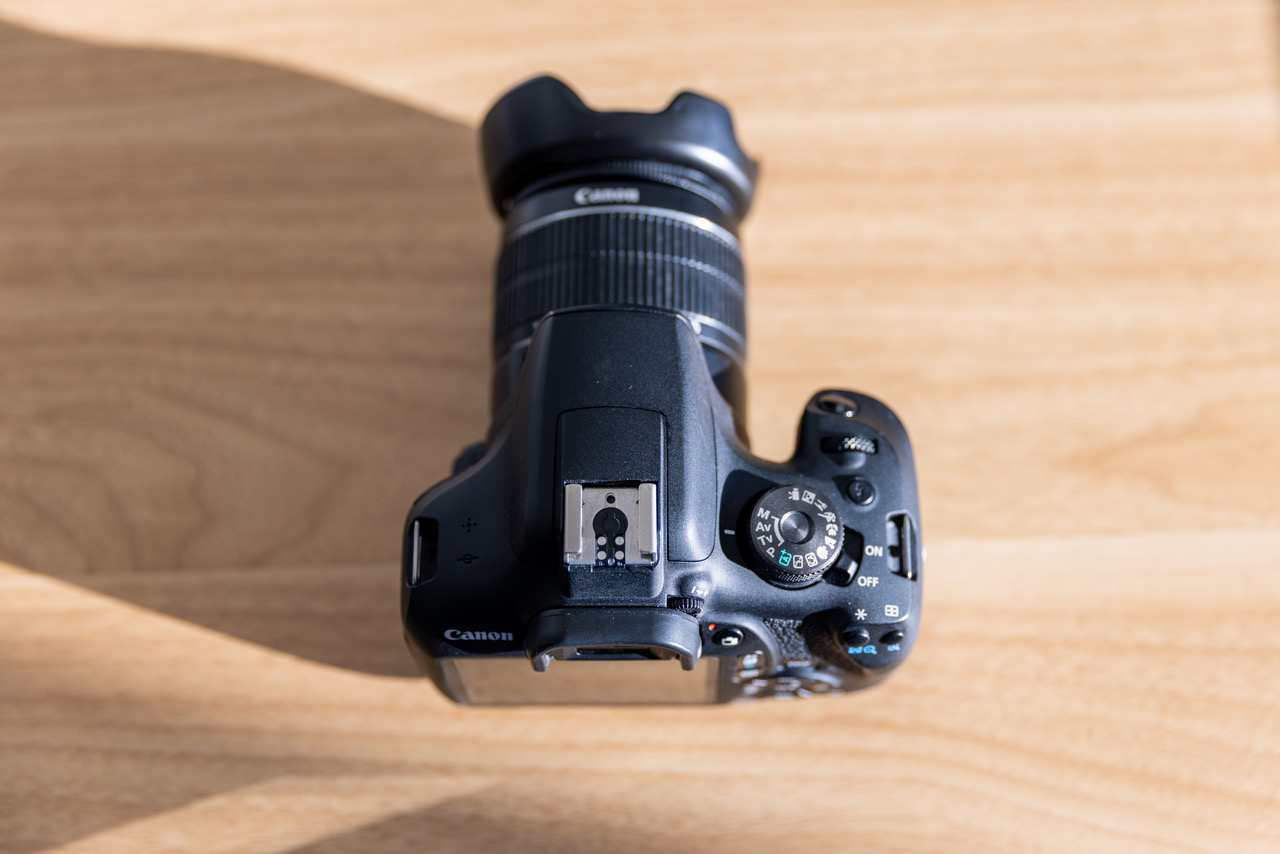
FIGURE 9. DSLR Camera with set on Aperture Priority mode (AV Mode) on the Dial.
Another option to facilitate intraoperative photography is to operate the camera in Manual mode with Auto-ISO. This option allows the operator to modify the aperture and shutter speed while the camera automatically changes the ISO to produce a well-exposed image. This camera mode allows the operator to select a desired depth of field and shutter speed to obtain sharper images while preventing camera shake with fast shutter speeds and having more areas of the subject in focus with a narrow aperture. The operator must be aware that low light situations can lead the camera to raise the ISO considerably, increasing the risk of introducing noise to the image. However, new-generation cameras can produce high quality images even with high ISO values due to their excellent ISO performance.
The use of a flash is recommended to provide good lighting to the image. However, care must be taken with the direction of the light source to prevent shadows around interest, especially when taking pictures of the oral cavity and the neck. The use of ring-flash devices can prevent undesirable shadows (Fig 10).

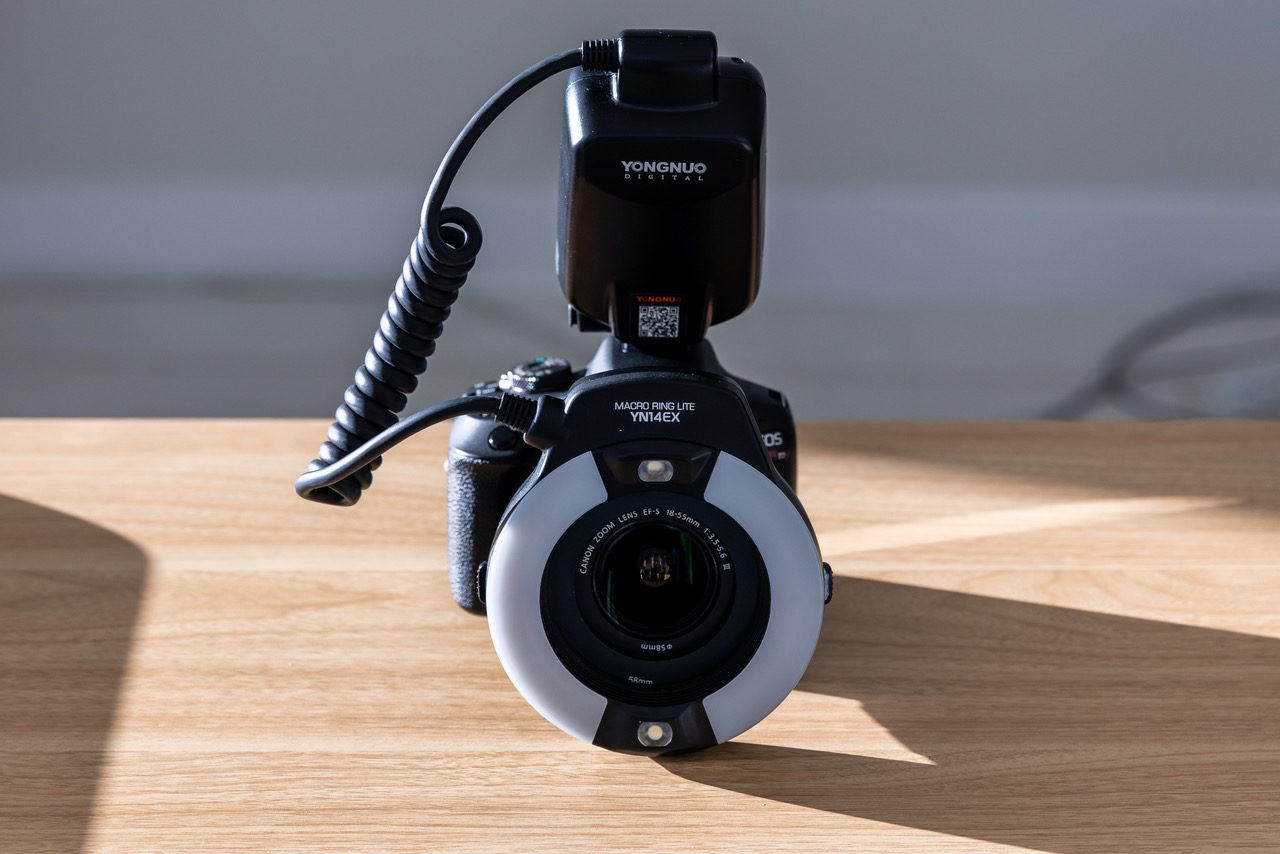
FIGURE 10. A ring-flash device adapted to a DSLR Camera for intraoperative photography.
Capturing Postoperative Pictures
The principles for postoperative photographs are similar to obtaining preoperative images. The photographs should focus on maintaining consistent angles, framing background, lighting, and patient position for accurate comparisons with preoperative images; reproducing the same camera setting used for the preoperative photographs can help maintain consistency among the images. In early postoperative photographs, it is recommended to clean the wounds from scabs and debris as well as possible to have an appealing image result.
4. Conclusion
Enhancing the quality of perioperative photography is essential for the comprehensive documentation and communication of surgical procedures. To improve the quality of perioperative photography, a few key principles stand out. First and foremost, standardization and consistency in photographic protocols can help ensure the reliability and comparability of images over time. A clean surgical field with good framing, lighting, and focus with the appropriate aperture and adequate shutter speed will produce better and sharper images. These principles collectively offer a roadmap to elevate the quality of perioperative photography, ensuring that it remains a valuable tool in medical documentation and education.
Acknowledgments
Funding: None
The author has viewed and agreed to the submission.
Declaration of Conflicting Interest
The author declares that there is no conflict of interest.
Funding
The author received no financial support for the research, authorship, and/or publication of this article.
IRB approval Statement
Written informed consent for publication in print and electronic form from the patients was obtained.
REFERENCES (9)
-
Guler SA, Demir O. The art of medical photography in breast surgery: clinical, intra-operative and specimen photography - standards and recommendations. Chirurgia (Bucur) 2021;116(2 Suppl):35–44.
-
Brochet L, Varazzani A, Delay A, et al. Photography in orthognathic surgery: a standardized protocol and storage legal implications. J Stomatol Oral Maxillofac Surg 2023;124(6):101467. https://doi.org/10.1016/j.jormas.2023.101467
-
Parsa S, Basagaoglu B, Mackley K, et al. Current and future photography techniques in aesthetic surgery. Aesthet Surg J Open Forum 2022;4:ojab050. https://doi.org/10.1093/asjof/ojab050
-
Galdino GM, DaSilva, Gunter JP. Digital photography for rhinoplasty. Plast Reconstr Surg2002;109(4):1421–34. https://doi.org/10.1097/00006534-200204010-00035
-
Siegel DM, Bhatia ND. Medical photography in the age of smartphone cameras. J Clin Aesthet Dermatol2021;14(10):16.
-
Deot N, Kiprovski A, Hatala A, et al. Evaluation of mobile and digital single-lens reflex photography for facial surgical analysis. Laryngoscope 2023;133(10):2590–6. https://doi.org/10.1002/lary.30573
-
Michelle L, Torabi SJ, Hutchison DM, et al. Standardizing a compact medical photography system for use in facial plastic surgery. Facial Plast Surg Aesthet Med 2023;25(4):353–4. https://doi.org/10.1089/fpsam.2022.0144
-
de Meijer PP, Karlsson J, LaPrade RF, et al. A guideline to medical photography: a perspective on digital photography in an orthopaedic setting. Knee Surg Sports Traumatol Arthrosc 2012;20(12):2606–11.https://doi.org/10.1007/s00167-012-2173-5
-
Wang K, Kowalski EJ, Chung KC. The art and science of photography in hand surgery. J Hand Surg Am2014;39(3):580–8. https://doi.org/10.1016/j.jhsa.2013.03.038